


Filter appointments
On the SCHEDULER screen, there is a set of filters that enable users to modify how their data is displayed:
- View
- Display
- Location
The VIEW filter :
- Day - gives a day's view of the appointment calendar
- Week - gives a week's view of the appointment calendar
- Schedule - displays all appointments starting from a set date without any end date limitation (i.e., infinite view)
- Calendars - shows appointments for a specified location. A certain location must be selected before specialists can be added to filtering
- Location - shows appointments for a specified specialist. First, a certain specialist must be selected and then their associated locations can be added to filtering
- Appointments - shows a list of appointments for a specified location, without any additional refinement
The calendar icon sets the display to the current date, so that the appointments will be shown from the current date and onwards. The date dropdown
opens the calendar allowing users to choose from which date to display appointments.
Controls will display the WEEK or DAY depending on the type of VIEW selected. In Week view, these controls will show the previous/next week. In Day/Schedule view, the previous/next day will be shown.
It is possible to review appointment details by clicking into the appointment entry in the Schedule list view or the respective appointment tile in the Day/Week grid view. Next to the EDIT and DELETE buttons, you can see appointment labels.
Create a single appointment
- Using the CREATE button
- From the Day/Week view grid (see below)
- For convenience, appointment reason has default duration (for example, Hearing Test (NHS) – 60 minutes, Tymp – 15 minutes). However, its duration can be changed if you modify the END TIME.

- Location
- Specialist
- Appointment reason
- Date
- Start time
- End time
- Resources
- Status
- Label
- Recurrence
- Campaign etc.
- Specialist and Resource fields are pre-filled if selected before creating an appointment.
- Date and Time are pre-filled:
- In Schedule view, they default to the current date and time.
- In Week/Day view, they match the clicked date-time slot.
Create a recurring appointment
1. Choose whether you want an initial appointment to repeat daily, weekly, monthly or yearly.
2. Specify how often you want the event to repeat (REPEAT EVERY), and when you want the event that repeats to end (ENDS).
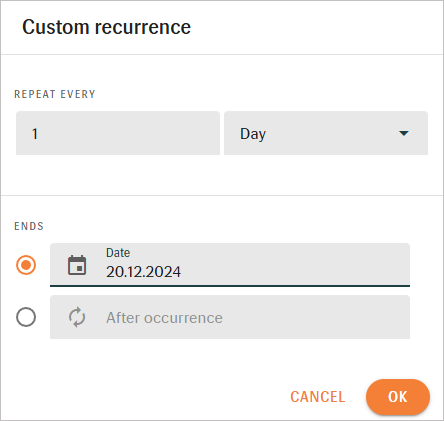
Daily
- An appointment recurs every day or every few days. The number of days between each occurrence must be from 1 to 31.
Weekly
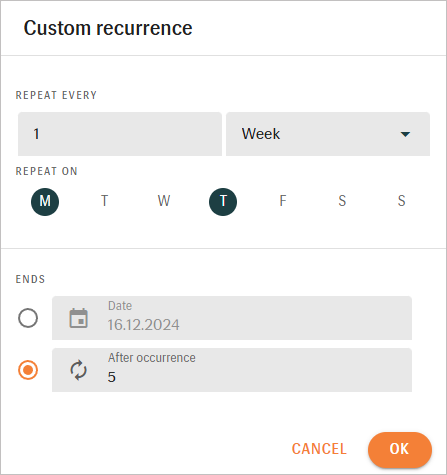
- An appointment repeats every week or every few weeks. The number of months between each occurrence must be from 1 to 10.
- Additionally, you can specify the days of the week when the event will occur. For example, an appointment that repeats every second week on Monday, Wednesday and Friday.
Monthly
- An appointment repeats on the same day of the month every month or every few months. The number of months between each occurrence must be from 1 to 12.
- In REPEAT ON, the options will depend on the date of the initial appointment.
Yearly
- An appointment repeats every year.
- In ENDS, choose a date no later than 5 years from the date of the initial appointment.
- In AFTER OCCURRENCE, you can choose from 1 to 360 repetitions for all options.
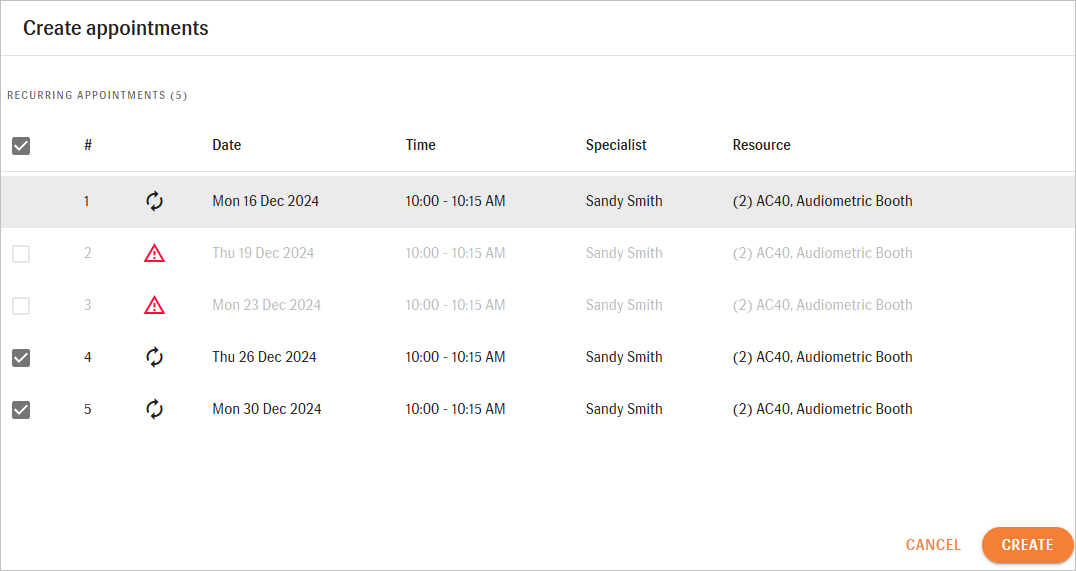
3. Check and update the recurrence. Upon creating or editing the recurring appointment, the validation appears containing information about all appointments in a series.
Here you can:
- View the list of all appointments in the series
- Select appointments to be created by ticking the box
- Edit and delete all appointments in the series except the initial one
- See warning messages in case of overlap or unavailability of a specialist or resource
The screen below shows that 2 out of 5 appointments cannot be created.
Users can easily manage a series of appointments. It is possible to edit or delete the selected appointment (Current appointment), following appointments in the series including the chosen appointment (This and all following appointments), or all appointments at once (All appointments series).
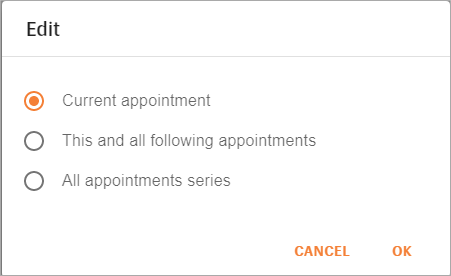
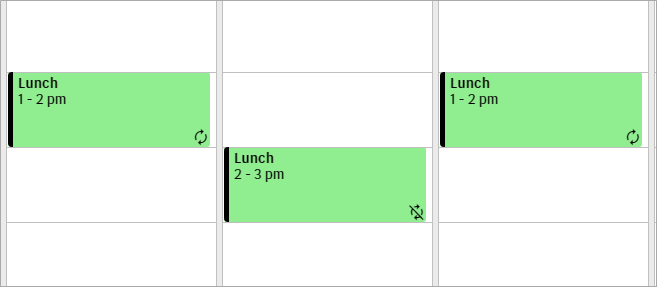
When opting for Current Appointment, the changes will be applied to a single appointment without changing the recurrence. In this case, this appointment will be unsynced from the recurrence.An example below shows that in a recurrence one appointment was moved and, therefore, unsynced from the series and marked with crossed-out arrows.
Open an appointment from a workflow
Print a pre-filtered schedule